If content is king, and a picture is worth a thousand words, it’s safe to say adding photos to your website is a crucial step in your website creation process.
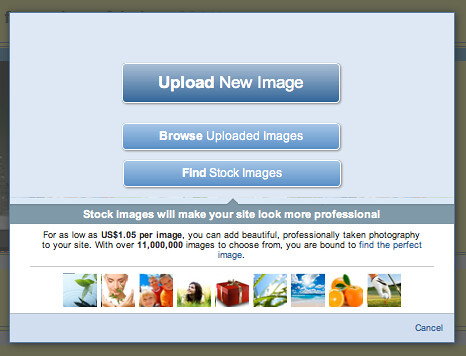
Simply drag and drop a Picture Widget where you’d like to see an image on your page. This will open a dialog box where you be given several options about where to get the picture you want to add to your Yola website.
- Upload New Image: This opens a window displaying the folders on your computer. Browse your folders for the image file you wish to use. We recommend that you use internet-friendly image formats such as .jpg, .png or .gif.
- Browse Uploaded Images: Click here to open your File Manager so you can select an image you’ve already uploaded into your Sitebuilder.
- Find Stock Images: Here you have one-click access to stock image photography from our partner Fotolia. Fotolia provides high quality, attractive images for your website at prices everyone can afford. If you want to achieve a more credible and professional web presence, we highly recommend Fotolia images.
Once your picture is placed on your page you can customize it by clicking “Edit” on the upper left hand corner of the widget. The widget will open, and you will see the following options:
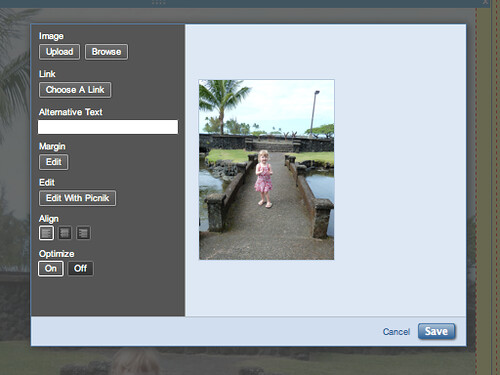
- Upload or Browse Image : You can replace your current picture by uploading or browsing for a new one. Click “Upload” to upload a new image from your computer, or click “Browse” to select an image already uploaded to your file manager.
- Choose a link: Use this feature to make your image a link. In the next dialog box you can choose between four different types of links. For more information, see the post “How do I create links to my website?”.
- Alternative Text: The text you enter here will be displayed when visitors mouse over your picture. More importantly, alternative text helps to provide good search results when people search for specific images.
- Edit Margin: This allows you to set the spacing of the picture widget to the surroundings on the page. If you edit the margin in the dialog window using the slider, the width of the margin varies uniformly around the picture widget. Alternately you can enter different values if the distances of image widgets to its environment at specific sites should be different.
- Edit with Picnik: This option takes you straight to our partner Picnik, a free online photo editor. Using Picnik you can crop, resize, remove red-eye, add frames or text — the possibilities are endless! Once you’re satisfied with your changes, click “Save To Yola”. Note that the original image is then replaced in your File Manager with the newly edited picture.
- Align: This feature allows you to align your picture to the left, right or center of your page.
- Optimize On/Off: If you upload large image files to your page, it can slow down the load time of your website. You can avoid this by clicking the “On” button which will automatically optimize your picture, allowing the image to load faster without creating a loss of quality when displayed. If you don’t like the way your image looks while optimized, click the “Off” button and Image Optimization will be removed.
Many thanks and I’ll be certain to check back soon for any improvements.